What Is Worm Composting?
Worm composting — also called vermicomposting — is the process of using worms to break down organic waste into nutrient-rich compost. Unlike traditional composting that relies on heat and microbes alone, vermicomposting harnesses the digestive power of specific earthworm species to transform your kitchen scraps into "black gold" for your garden.
The end product, called worm castings (a polite way of saying worm poop), is one of the most nutrient-dense, biologically active soil amendments available. Plants absolutely love it.
Why Should You Start Worm Composting?
There are plenty of reasons to give vermicomposting a try, whether you're a gardener, an environmentalist, or just someone who hates how much trash you produce.
Environmental Impact
- Reduces landfill waste by up to 30%. Food scraps are the single largest category of material going to landfills, where they produce methane — a greenhouse gas 80x more potent than CO2 over 20 years.
- Creates a closed-loop system. Scraps become compost, compost feeds plants, plants produce food, food scraps go back to the worms. Nature at its finest.
Garden Benefits
- Worm castings contain 5x more nitrogen, 7x more phosphorus, and 11x more potassium than typical garden soil.
- Castings also contain beneficial microbes that help plants resist disease.
- Worm tea (liquid runoff from the bin) makes an excellent foliar spray and liquid fertilizer.
Practical Benefits
- Works in small spaces. No backyard needed. A bin fits under your kitchen sink, on a balcony, or in a closet.
- No smell when done correctly. A healthy worm bin smells like forest floor — earthy and pleasant.
- Low maintenance. Feed your worms once or twice a week, harvest compost every 3-6 months.
What You Need to Get Started
Here's your shopping list. The whole setup costs between $20 and $60, depending on whether you buy or build your bin.
The Essentials
- A worm bin — You can buy a commercial bin (like the Worm Factory 360 or Urban Worm Bag) or build one from a plastic storage tote. See our guide on building your first worm bin.
- Composting worms — Red wigglers (Eisenia fetida) are the gold standard. You'll need about 1 pound (roughly 1,000 worms) to start. See our guide on best worms for composting.
- Bedding — Shredded newspaper, cardboard, coconut coir, or aged leaves. This is the worm's habitat — they live in it and eat it over time.
- Food scraps — Fruit and vegetable peels, coffee grounds, tea bags, crushed eggshells. See our guide on feeding your worms.
Nice to Have
- A spray bottle for moisture management
- A small kitchen compost pail to collect scraps before feeding
- A thermometer (worms prefer 55-77°F / 13-25°C)
Setting Up Your Worm Bin: Step by Step
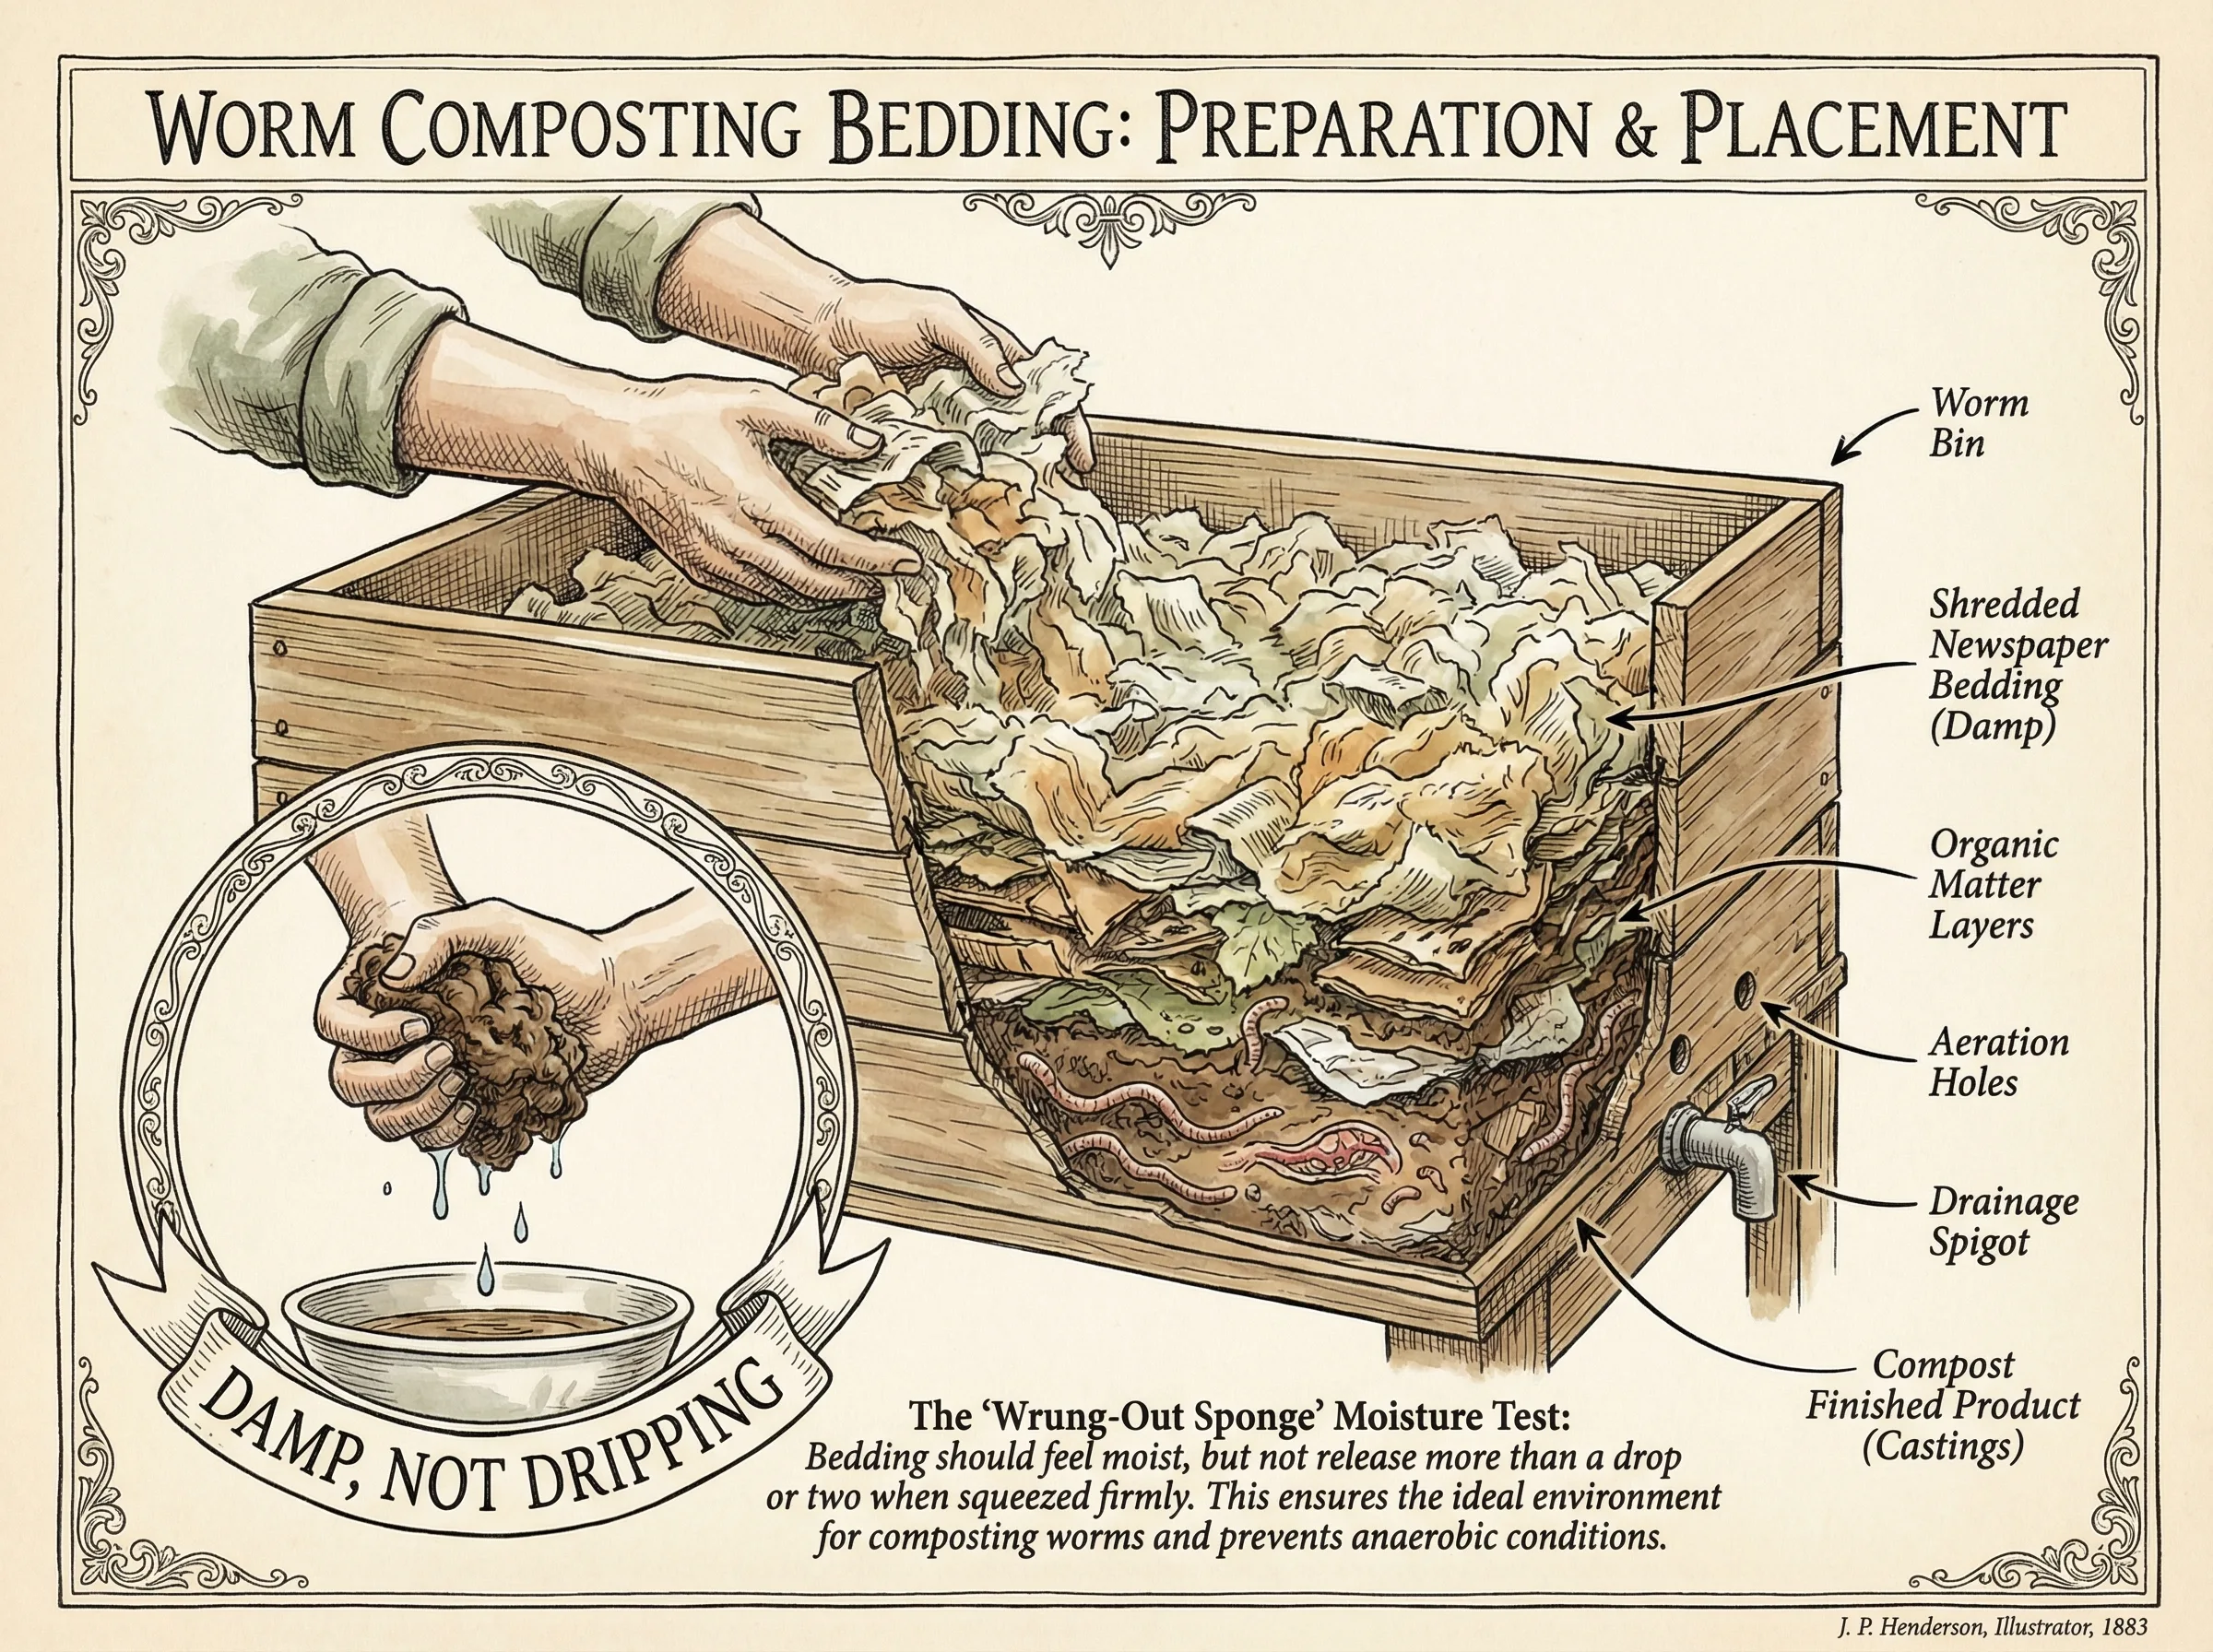
Step 1: Prepare the Bedding
Shred newspaper into 1-inch strips or tear cardboard into small pieces. You want enough to fill your bin about 3/4 full when fluffed up. Soak the bedding in water, then wring it out until it's about as damp as a wrung-out sponge. This moisture level is critical — worms breathe through their skin and need moisture to survive.
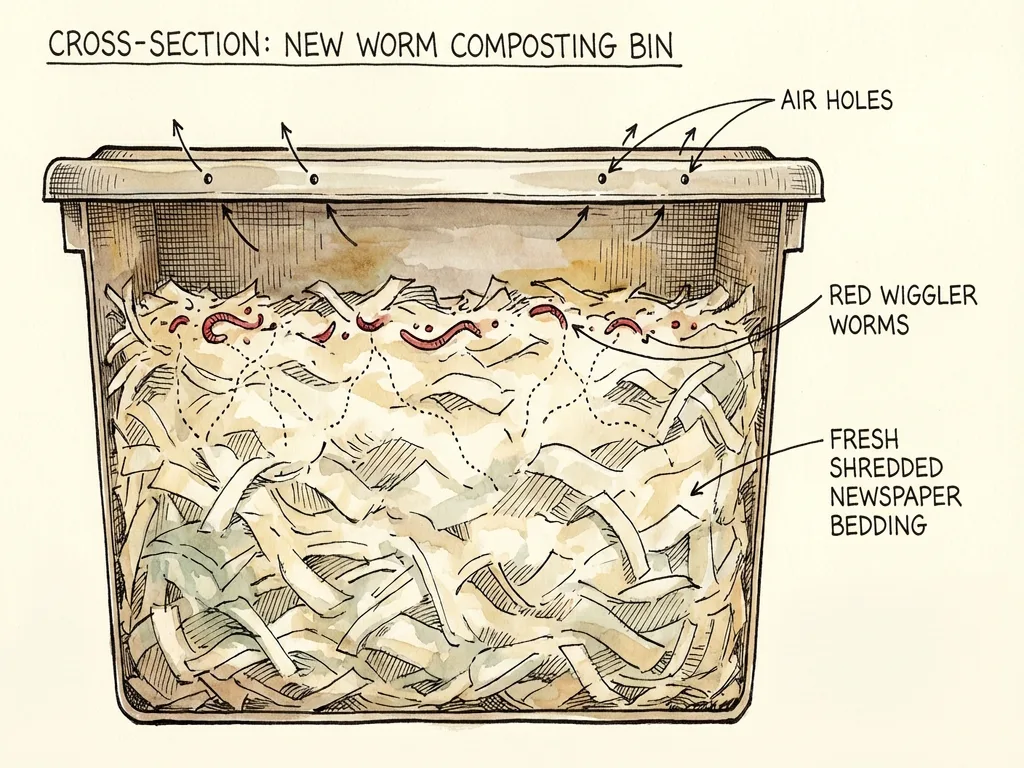
Step 2: Add the Bedding to Your Bin
Fluff up the damp bedding and place it in your bin. Don't pack it down — worms need air pockets to move through. Add a couple handfuls of plain garden soil or finished compost to introduce beneficial microbes.
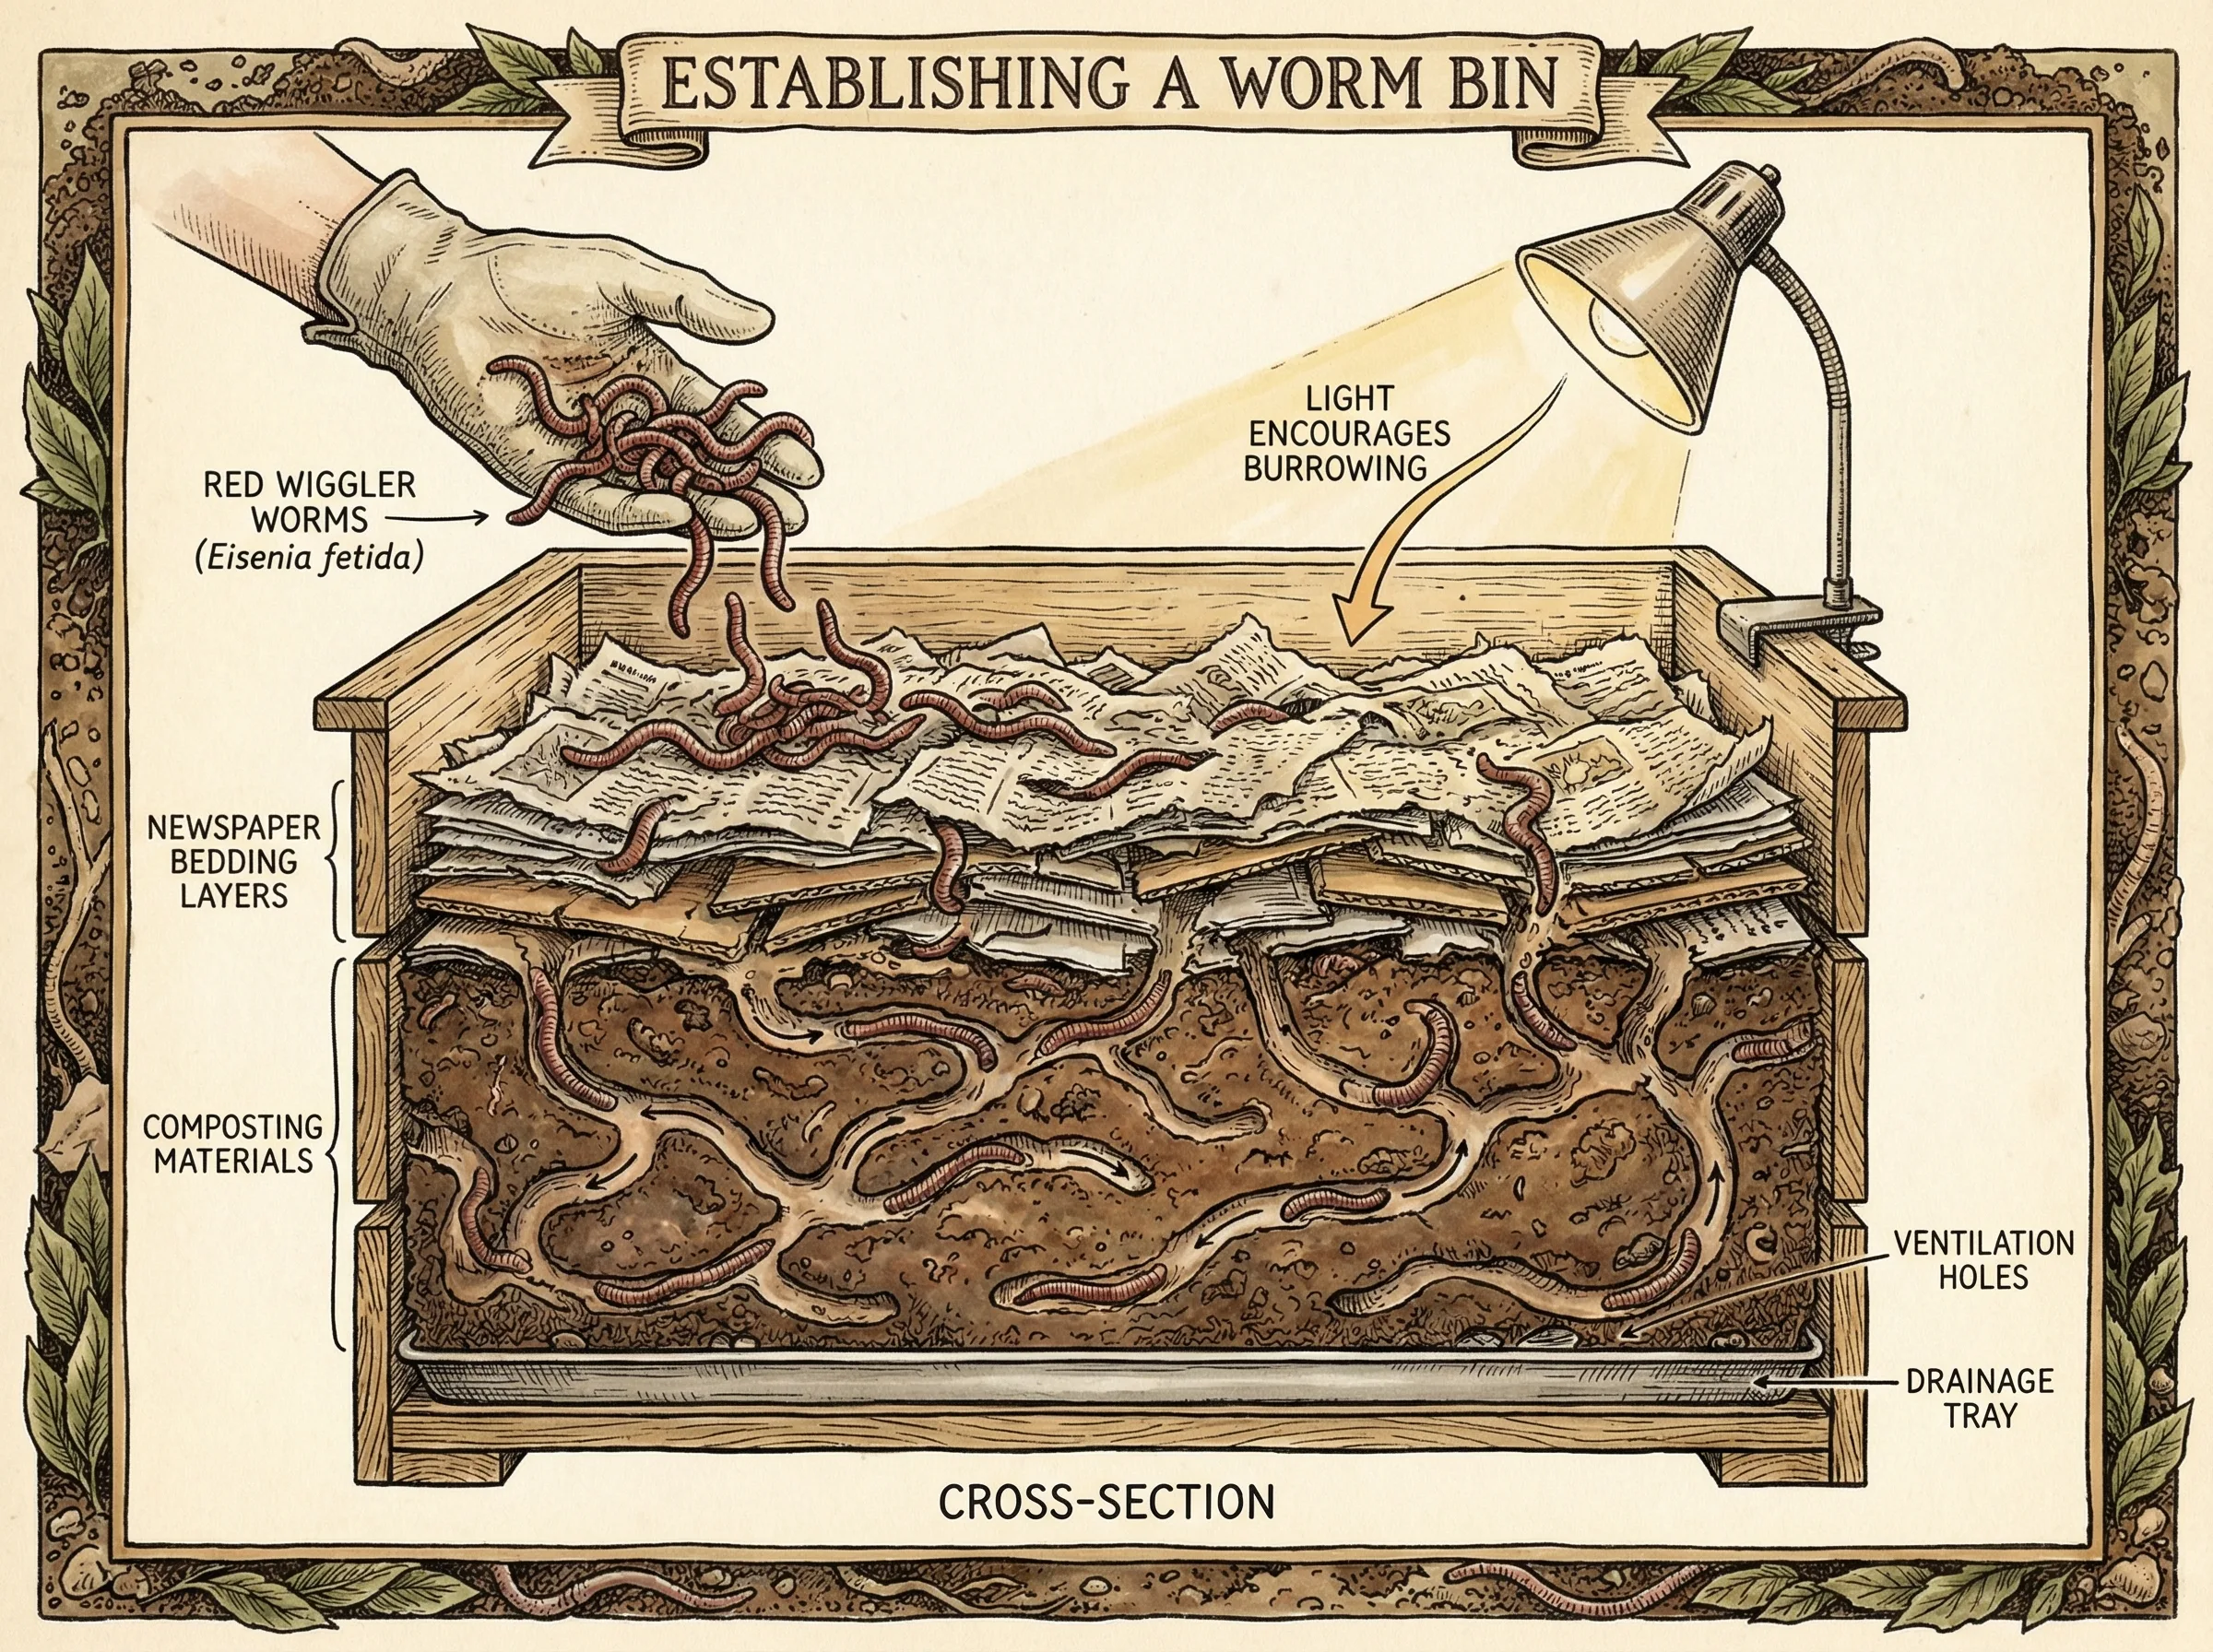
Step 3: Add Your Worms
Gently place your worms on top of the bedding. Leave the lid off with a light on for 30 minutes to an hour — worms hate light and will burrow down into the bedding on their own.
Step 4: Wait Before Feeding
Give your worms 2-3 days to settle in before their first feeding. They're adjusting to their new home and need time to acclimate.
Step 5: Start Feeding
Bury a small amount of food scraps (start with about 1 cup) in one corner of the bin. Cover the food with bedding. Wait until most of that food is gone before adding more — usually 3-7 days.
Where to Put Your Worm Bin
Worms are surprisingly flexible about location, but they do have preferences:
- Temperature: 55-77°F (13-25°C) is ideal. They'll survive as low as 40°F and as high as 85°F, but they slow down outside their comfort zone and can die at extremes.
- Light: Keep the bin in a shaded spot. Worms are photophobic — they avoid light.
- Ventilation: The bin needs airflow. Don't seal it in an airtight container.
Popular locations: Under the kitchen sink, in a pantry, in the garage, on a covered balcony, in a basement. Basically anywhere that stays a moderate temperature.
Common Beginner Mistakes
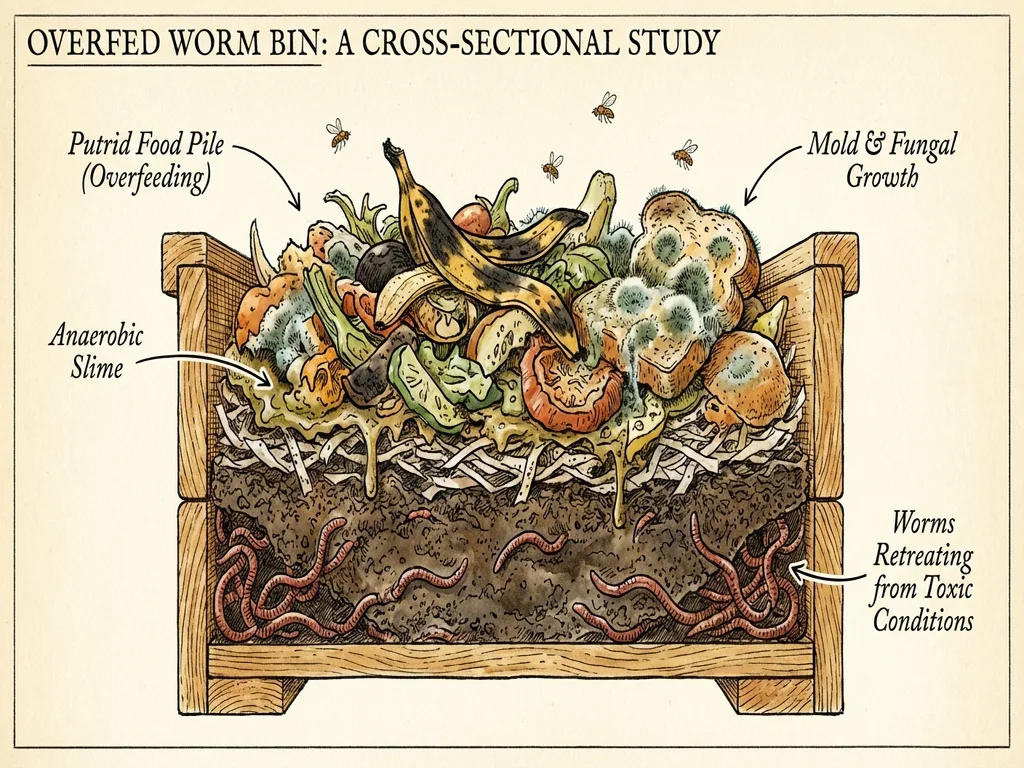
- Overfeeding. This is the #1 mistake. Start small and increase gradually. If food is rotting faster than worms can eat it, you've added too much.
- Too wet or too dry. The bedding should feel like a wrung-out sponge. If you see standing water, add dry bedding. If it feels dusty, mist with water.
- Wrong worms. Garden earthworms (the ones you dig up in your yard) won't survive in a bin. You need composting species like red wigglers.
- Forgetting bedding. Worms need bedding as much as food. Keep adding shredded newspaper or cardboard as the bedding breaks down.
- Giving up too soon. The first month is the hardest. Once your bin ecosystem stabilizes, it practically runs itself.
What to Expect
Week 1-2: Not much visible change. Worms are settling in. You might not see them — they'll be burrowed deep in the bedding.
Week 3-4: You'll notice food disappearing faster. The bedding will start to darken and compact.
Month 2-3: The bin is humming along. You can feed more regularly. The bedding is noticeably darker and breaking down.
Month 3-6: Time for your first harvest! The bottom of the bin will be filled with dark, crumbly worm castings. Push the castings to one side, add fresh bedding and food to the other side, and the worms will migrate over in a week or two.
Next Steps
Ready to dive deeper? Check out these guides:
- Best Worms for Composting — Pick the right species for your setup
- Building Your First Worm Bin — DIY bin instructions
- Feeding Your Worms — What goes in (and what doesn't)
- Troubleshooting Your Worm Bin — Fix common problems
Your Bin's Journey
Click each stage to see how your bin evolves over time:
Weeks 1-2: Settling In
Your worms are adjusting to their new home. They may not eat much yet — that's normal. Keep the lid on, check moisture, and resist the urge to dig around.
Watch for: Worms burrowing down within an hour of being added.
Are You Making These Mistakes?
Check off any that apply for specific fixes:
Common Mistakes Checker
Check any mistakes you might be making for specific advice.
Looking good! You're avoiding the common pitfalls.